How-To Guide | Create a Basemap in Inkscape
How-To Guide | Create a Basemap in Inkscape
INKSCAPE
Inkscape is a great alternative to Adobe Illustrator and InDesign due to the easy interface yet complex and extensive capabilities to create and edit 2D objects such as symbols, logos, and documents. The program will allow the user to save their work without it being pixelated, since it is a vector-based program.
The program will allow the user to save their work without it being pixelated, since it is a vector-based program.
ACQUIRING INKSCAPE
The cost: free
To download the program, the INKSCAPE website offers a download link to your platform (Windows, MAC, Linux). Go to - https://inkscape.org/en/
Once the platform is selected, the website will offer the most recent version of the program.
When the download is complete, the following icon will appear on your desktop and is ready to run.
THE INTERFACE
We will create a basemap as an example to get you oriented with the software.
Here are some helpful tools that will be useful for the purpose of drawing a basemap.
- Save
- Zoom to Canvas
- Object Properties (line weight, line style, colour, etc.)
- Text Edit
- Layers
- Align Tool
- Cursor to select and transform objects
- Drawing rectangles and squares
- Drawing Circles
- "Pencil tool" used for free lines
- "Pen tool" used to connect lines
- Text Tool
- Eraser
- Canvas/Workspace
- Colour Palette
- Active Layer
SHORTCUTS
Zoom In/Out - (Ctrl + Scroll)
Horizontal Scrolling - (Shift + Scroll)
SETTING UP
After familiarizing yourself with the program, set up your document to use throughout the process. Press File > Document Properties
We will use an A3 size (16.54"x11.69”) canvas (landscape orientation) for the purpose of drawing a basemap that can be compatible with the Microsoft PowerPoint software. It will be proportional to an aerial map from Google Maps that we will import as a reference to trace the elements that we need on our base map.
Only the contents visible within the canvas will be shown when saved or printed.
IMPORTING AN AERIAL IMAGE
When making a basemap, a reference image is needed for a location’s context, accuracy, and scale.
A method to obtain a free aerial image is to utilize readily available services such as Google Maps or Google Earth. Go to - https://www.google.com/maps
While in Google Map, the image must be set to satellite image so that the view will show the actual building footprint for tracing.
For PC users, you simply need to take a screenshot (PrtScn) of the location wanted and paste (Shift+V) it into INKSCAPE.
For MAC users, the best way to retrieve the image is also by taking a screenshot (Shift+Command+3) then dragging the image into INKSCAPE from your screenshot destination folder.
When the image is pasted onto the Inkscape canvas, initially it may be too big for the A3 size. You should proportionally scale down the image to fit the canvas.
Line up aerial to one side of canvas. Hold Ctrl while dragging.
Black arrows show up in the four different corners when you click on the image. You should click and hold Ctrl while dragging an arrow to have the aerial fit to the canvas.
LAYERS
Managing layers is important because the feature allows you to view, edit, and create on the relevant layer.
Properly managing and naming these layers will give you the ability to easily edit the file in the future. Your drawing will be more organized since the different components will be separate.
When editing an object in one layer, features in other layers will not be affected.
- Click to get layers window
- Manage position of layers with arrow button icons
- Start adding or removing layers with the "Plus(+)" and "Minus(-)" buttons
Once you start drawing, it is important to occasionally check to make sure you are drawing on the correct layer because mixing layers will be equivalent to merging layers, and once you edit one element, all will be edited.
The active layer will be highlighted. To change layers, you can simply click on the layer or click on an object in that particular layer and start drawing.
DRAWING
It is helpful to start drawing from the bottom layer and work your way up. The layers are initially set up from the bottom to the top and it produces a visible drawing of each component.
For more detailed layers, such as the street or road markings, it may be useful to zoom in (Ctrl+Scroll) for accuracy.
Start tracing each layer using the ‘pen tool’ .
When each layer is complete, you will want to turn off the aerial layer to edit individual layers. Turning off the aerial will isolate your drawing and make it easier to edit. You can also choose to do this step at the end if you have an organized layering system.
- To edit the entire layer, you will want to isolate that layer by hiding other layers otherwise you will have to manually select all the objects in the layer you want to manipulate.
- After you isolate the layer, (Ctrl+A) to select every object on the canvas and edit the stroke paint and weight. (For a visually pleasing graphic, the higher the object, the darker the lineweight should be since it will pop out more.)
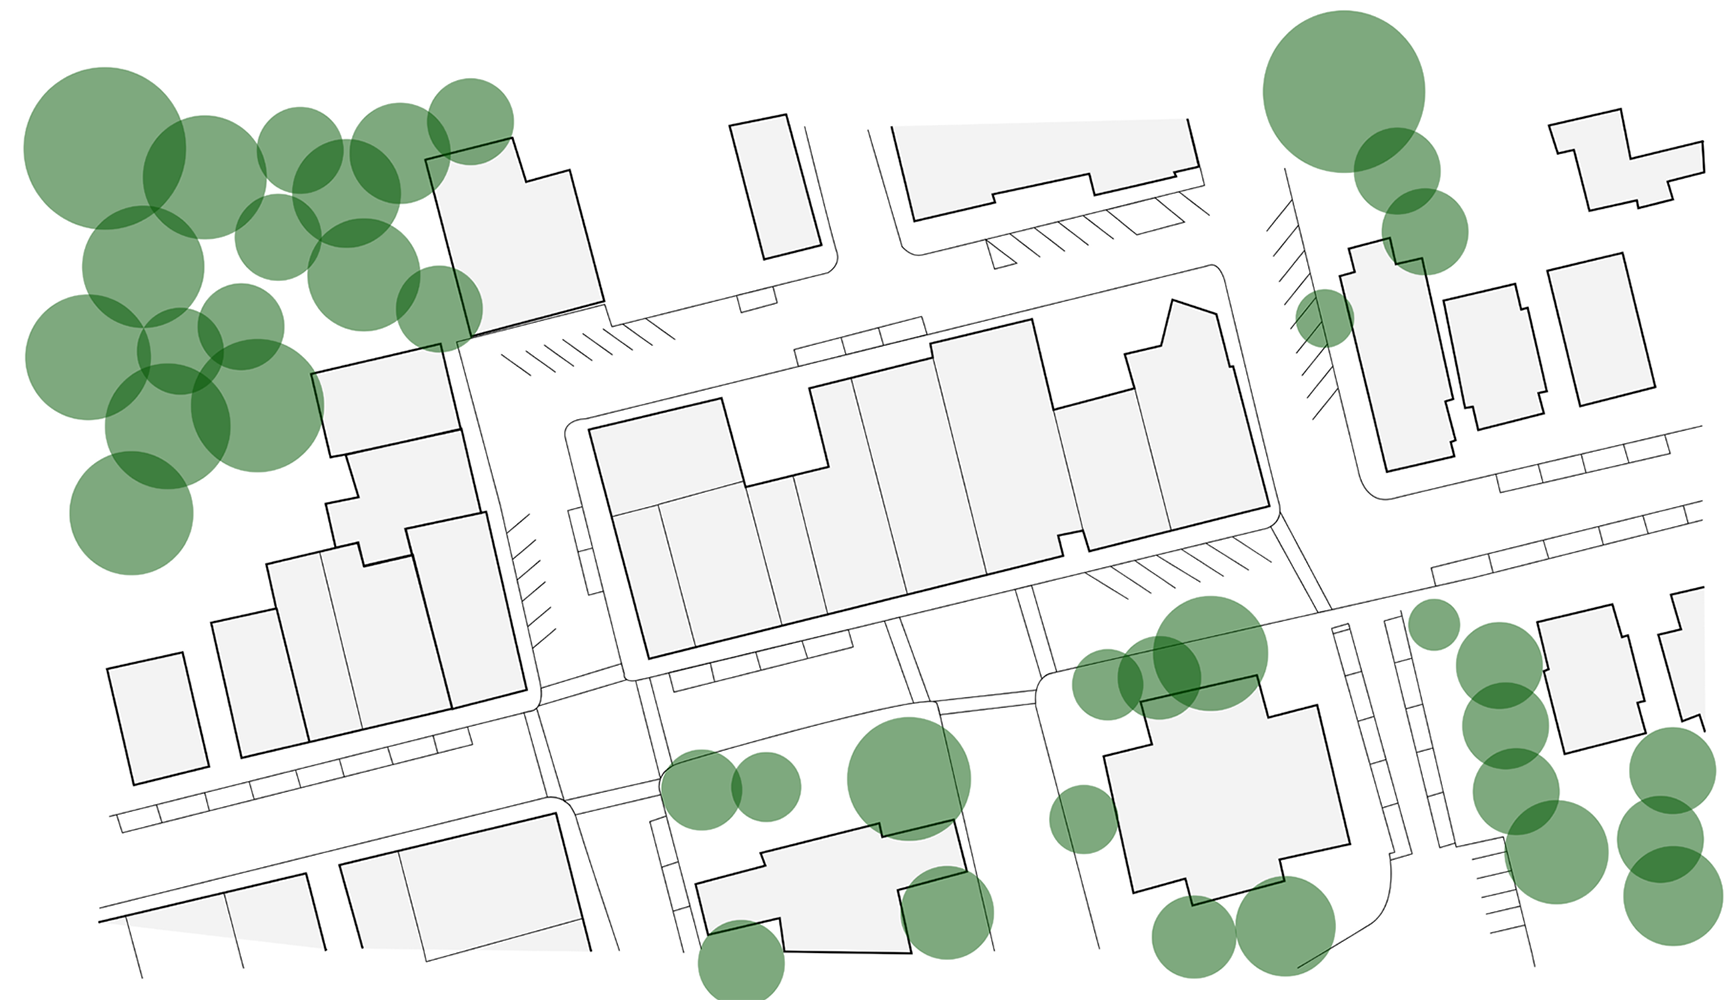
EXAMPLE LAYERS TRACED
Arrange your layers with Roads on the bottom, then Road Markings, then Buildings, and with Trees as the top layer.
POST-DRAWING PROCESSING
Check that you have all your drawing edited and processed with everything fitting to the canvas. You will want to make sure you have a graphic scale for your drawing to be measurable and a north arrow for context along with other labels added using the text tool.
SAVING
To save your drawing, go to File> Save as > (file name of your preference) [Owingsville_Basemap.pdf]
Save your work often!
Related Information